Full PDF of this lesson can be found here.
ISO, or film speed, is really just a setting to determine how quickly an image will be captured by either the film or digital sensor. The higher the ISO, the quicker the image will be captured and the less light that is required. The lower the ISO, the longer it takes for the image to be captured and the more light you will need.
general rule of thumb:
100 - 200 sunny and outdoors
400 in the shade, overcast, indoors with good light
800 - 1600 indoors, low light conditions, sports or action
Shutter Speed
After you’ve considered your ISO it’s time to think about shutter speed.
Your shutter speed is how quickly the shutter, or the little door that opens in front of your film or image sensor, operates. It can range from several seconds (or minutes on the Bulb setting) to 1/1600 of a second or faster. It might help to visualize your shutter literally as a door, with your shutter speed controlling how fast or how slow the door opens and closes. A faster shutter speed will freeze action whereas a slower shutter speed can create a blurred effect (or can just be downright blurry.) When you set your shutter speed on your camera, you’ll see numbers like 60, 120, 250, 1000 and so on. These actually represent 1/60th of a second, 1/120th of a second and so on. So the higher the bottom number on the fraction, the faster the shutter speed. The smaller the number, the slower the shutter speed. You will also see shutter speeds for seconds, indicated by inch marks ("). For example, if the display says 1"5, that indicates a shutter speed of 1½ seconds. If the display says 30", the shutter will be open for 30 seconds.
general rule of thumb:
use a tripod or flat surface to steady your hand for anything 1/50th or under
if you are handholding, use a minimum of 1/60th. Hold your breath while taking the photo to reduce camera shake.
fast moving objects require at least 1/1000 to freeze the action.
Weekly Challenge: Kitchen Sink Test
Set your camera to Shutter Speed Priority (S or TV mode). If you are inside, set the ISO between 1000 - 1600.
1. Find your kitchen sink (that shouldn’t be too hard.)
2. Now locate an object that is going to obstruct the water flowing from the faucet, like a cup. Place it below the running water.
3. Set your shutter speed to 1/80th of a second (indicated by the number 80.) Turn on the water and take the picture.
4. Now set your shutter really high (around 1/1000 of a second or higher) and take the photo again.
***Bonus points: Grab your tripod and set up your shot again using a really slow shutter speed, such as half a second, indicated as 0"5, or 1 second, indicated as 1". What effect does that give you? In what situations can you use this effect?****
Tuesday, January 4, 2011
Monday, January 3, 2011


Monday, December 6, 2010
We're up and running! Week 1
Hi ladies! I am so excited to do this. These lessons that Amy sent me back when I first got my camera helped so much. I'm thinking that I wll post a lesson each week and when everyone completes them you can send me your photos and I will post at the end of the week right before we start another lesson. How does that sound?
If you have flickr or use another photo-sharing website, leave a comment with a link to you photo(s) or you can just e-mail them to me and I can post throught my own flickr. I'm totally open to other suggestions too!
All of the lessons can be found here in PDF form: http://sites.google.com/site/biowbiow002/twopeas_12week
I'm just going to copy and paste...
And now here is lesson 1: Aperture
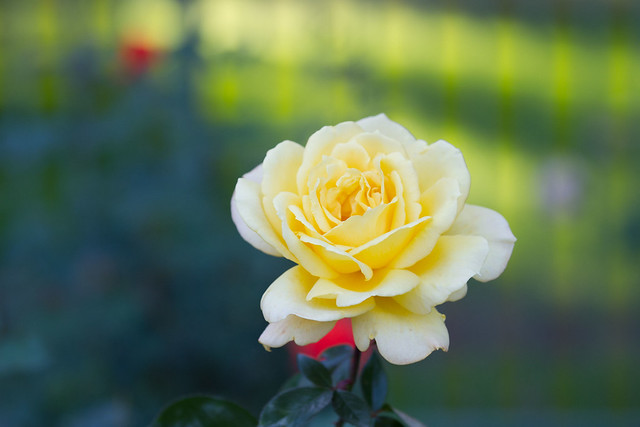
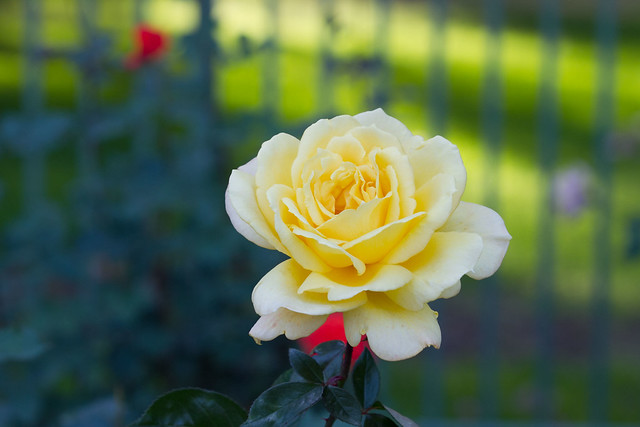
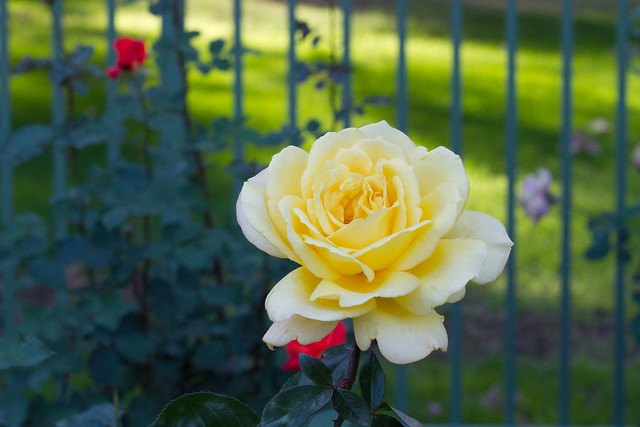
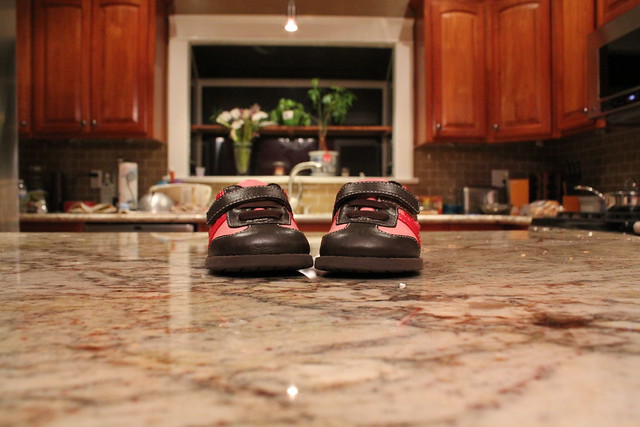
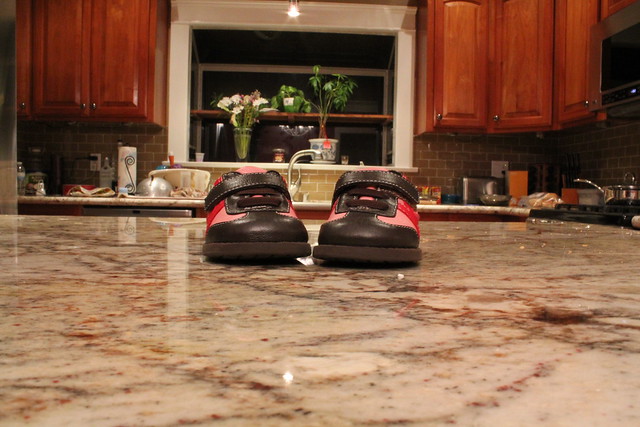
One of the most necessary but often times least understood parts of photography is Aperture. The size of the aperture, or f/stop, of a lens determines how much of your photograph is infocus. Generally, when you hear someone talk about f/stop, they are referring to aperture -- the terms are often used interchangeably. The f/stop on a lens can go from 1.2 to 22 or sometimes higher. (It’s not really important to this class for you to understand the mathmatical basis for these numbers, but instead to understand what they mean to your photography.)F/stops can be confusing at first. The f/stop numbers refer to how open or closed the aperture on the lens is. The wider the opening of the lens, the greater the amount of light that enters your camera at one time – which means that when your aperture is wide open your focus will be shallower and fewer things in your photo will be in focus. The smaller the opening on the lens, the smaller the amount of light that is allowed to enter your camera at one time – which means your focus is deeper and more of your photo will be in focus.The confusion for most people arrives when you try and put the f/stop number with these scenarios. In terms of aperture openings, f/1.4 would be a wide-open aperture on most high-end lenses, whereas f/22 would be a virtually closed aperture.Basically, when you use a low f/stop, less of your photo will be in focus. When you use a higher f/stop, MORE of your photo will be in focus.
Challenge:
set the camera on aperture priority (A or A/V mode). find a fixed object set away from a backdrop and take the same photo 3x.
photo1: choose the lowest fstop your camera allows (f1.8 with most fixed primes. f3.5 for most kit lenses. may vary depending on your lens). compose and focus on your object.
photo2: take the same photo, but select f/8. compose and refocus on the same point of your object.
photo3: choose the highest fstop your camera allows (usually f22). compose and refocus on the same point of your object.
If you have flickr or use another photo-sharing website, leave a comment with a link to you photo(s) or you can just e-mail them to me and I can post throught my own flickr. I'm totally open to other suggestions too!
All of the lessons can be found here in PDF form: http://sites.google.com/site/biowbiow002/twopeas_12week
I'm just going to copy and paste...
And now here is lesson 1: Aperture
One of the most necessary but often times least understood parts of photography is Aperture. The size of the aperture, or f/stop, of a lens determines how much of your photograph is infocus. Generally, when you hear someone talk about f/stop, they are referring to aperture -- the terms are often used interchangeably. The f/stop on a lens can go from 1.2 to 22 or sometimes higher. (It’s not really important to this class for you to understand the mathmatical basis for these numbers, but instead to understand what they mean to your photography.)F/stops can be confusing at first. The f/stop numbers refer to how open or closed the aperture on the lens is. The wider the opening of the lens, the greater the amount of light that enters your camera at one time – which means that when your aperture is wide open your focus will be shallower and fewer things in your photo will be in focus. The smaller the opening on the lens, the smaller the amount of light that is allowed to enter your camera at one time – which means your focus is deeper and more of your photo will be in focus.The confusion for most people arrives when you try and put the f/stop number with these scenarios. In terms of aperture openings, f/1.4 would be a wide-open aperture on most high-end lenses, whereas f/22 would be a virtually closed aperture.Basically, when you use a low f/stop, less of your photo will be in focus. When you use a higher f/stop, MORE of your photo will be in focus.
Challenge:
set the camera on aperture priority (A or A/V mode). find a fixed object set away from a backdrop and take the same photo 3x.
photo1: choose the lowest fstop your camera allows (f1.8 with most fixed primes. f3.5 for most kit lenses. may vary depending on your lens). compose and focus on your object.
photo2: take the same photo, but select f/8. compose and refocus on the same point of your object.
photo3: choose the highest fstop your camera allows (usually f22). compose and refocus on the same point of your object.
Saturday, September 18, 2010
Subscribe to:
Posts (Atom)